Network Configuration for TeSys
CANopen Network Configuration Procedure for TeSysU Motor Starters
This procedure describes the integration of a logic controller and TeSysU motor starters in a CANopen network using EcoStruxure Machine Expert.
NOTE: The principles to integrate a TeSysT motor management system are the same.
For electrical connection, refer to manuals mentioned in the Related Documents.
Before instantiating the TeSys device function blocks in EcoStruxure Machine Expert application project, configure the CANopen network as given in the following procedure:
Configuring the CANopen Network
|
Step |
Action |
|---|---|
|
1 |
Open new EcoStruxure Machine Expert project. |
|
2 |
Right-click CAN and select Add Device as shown in the figure below. 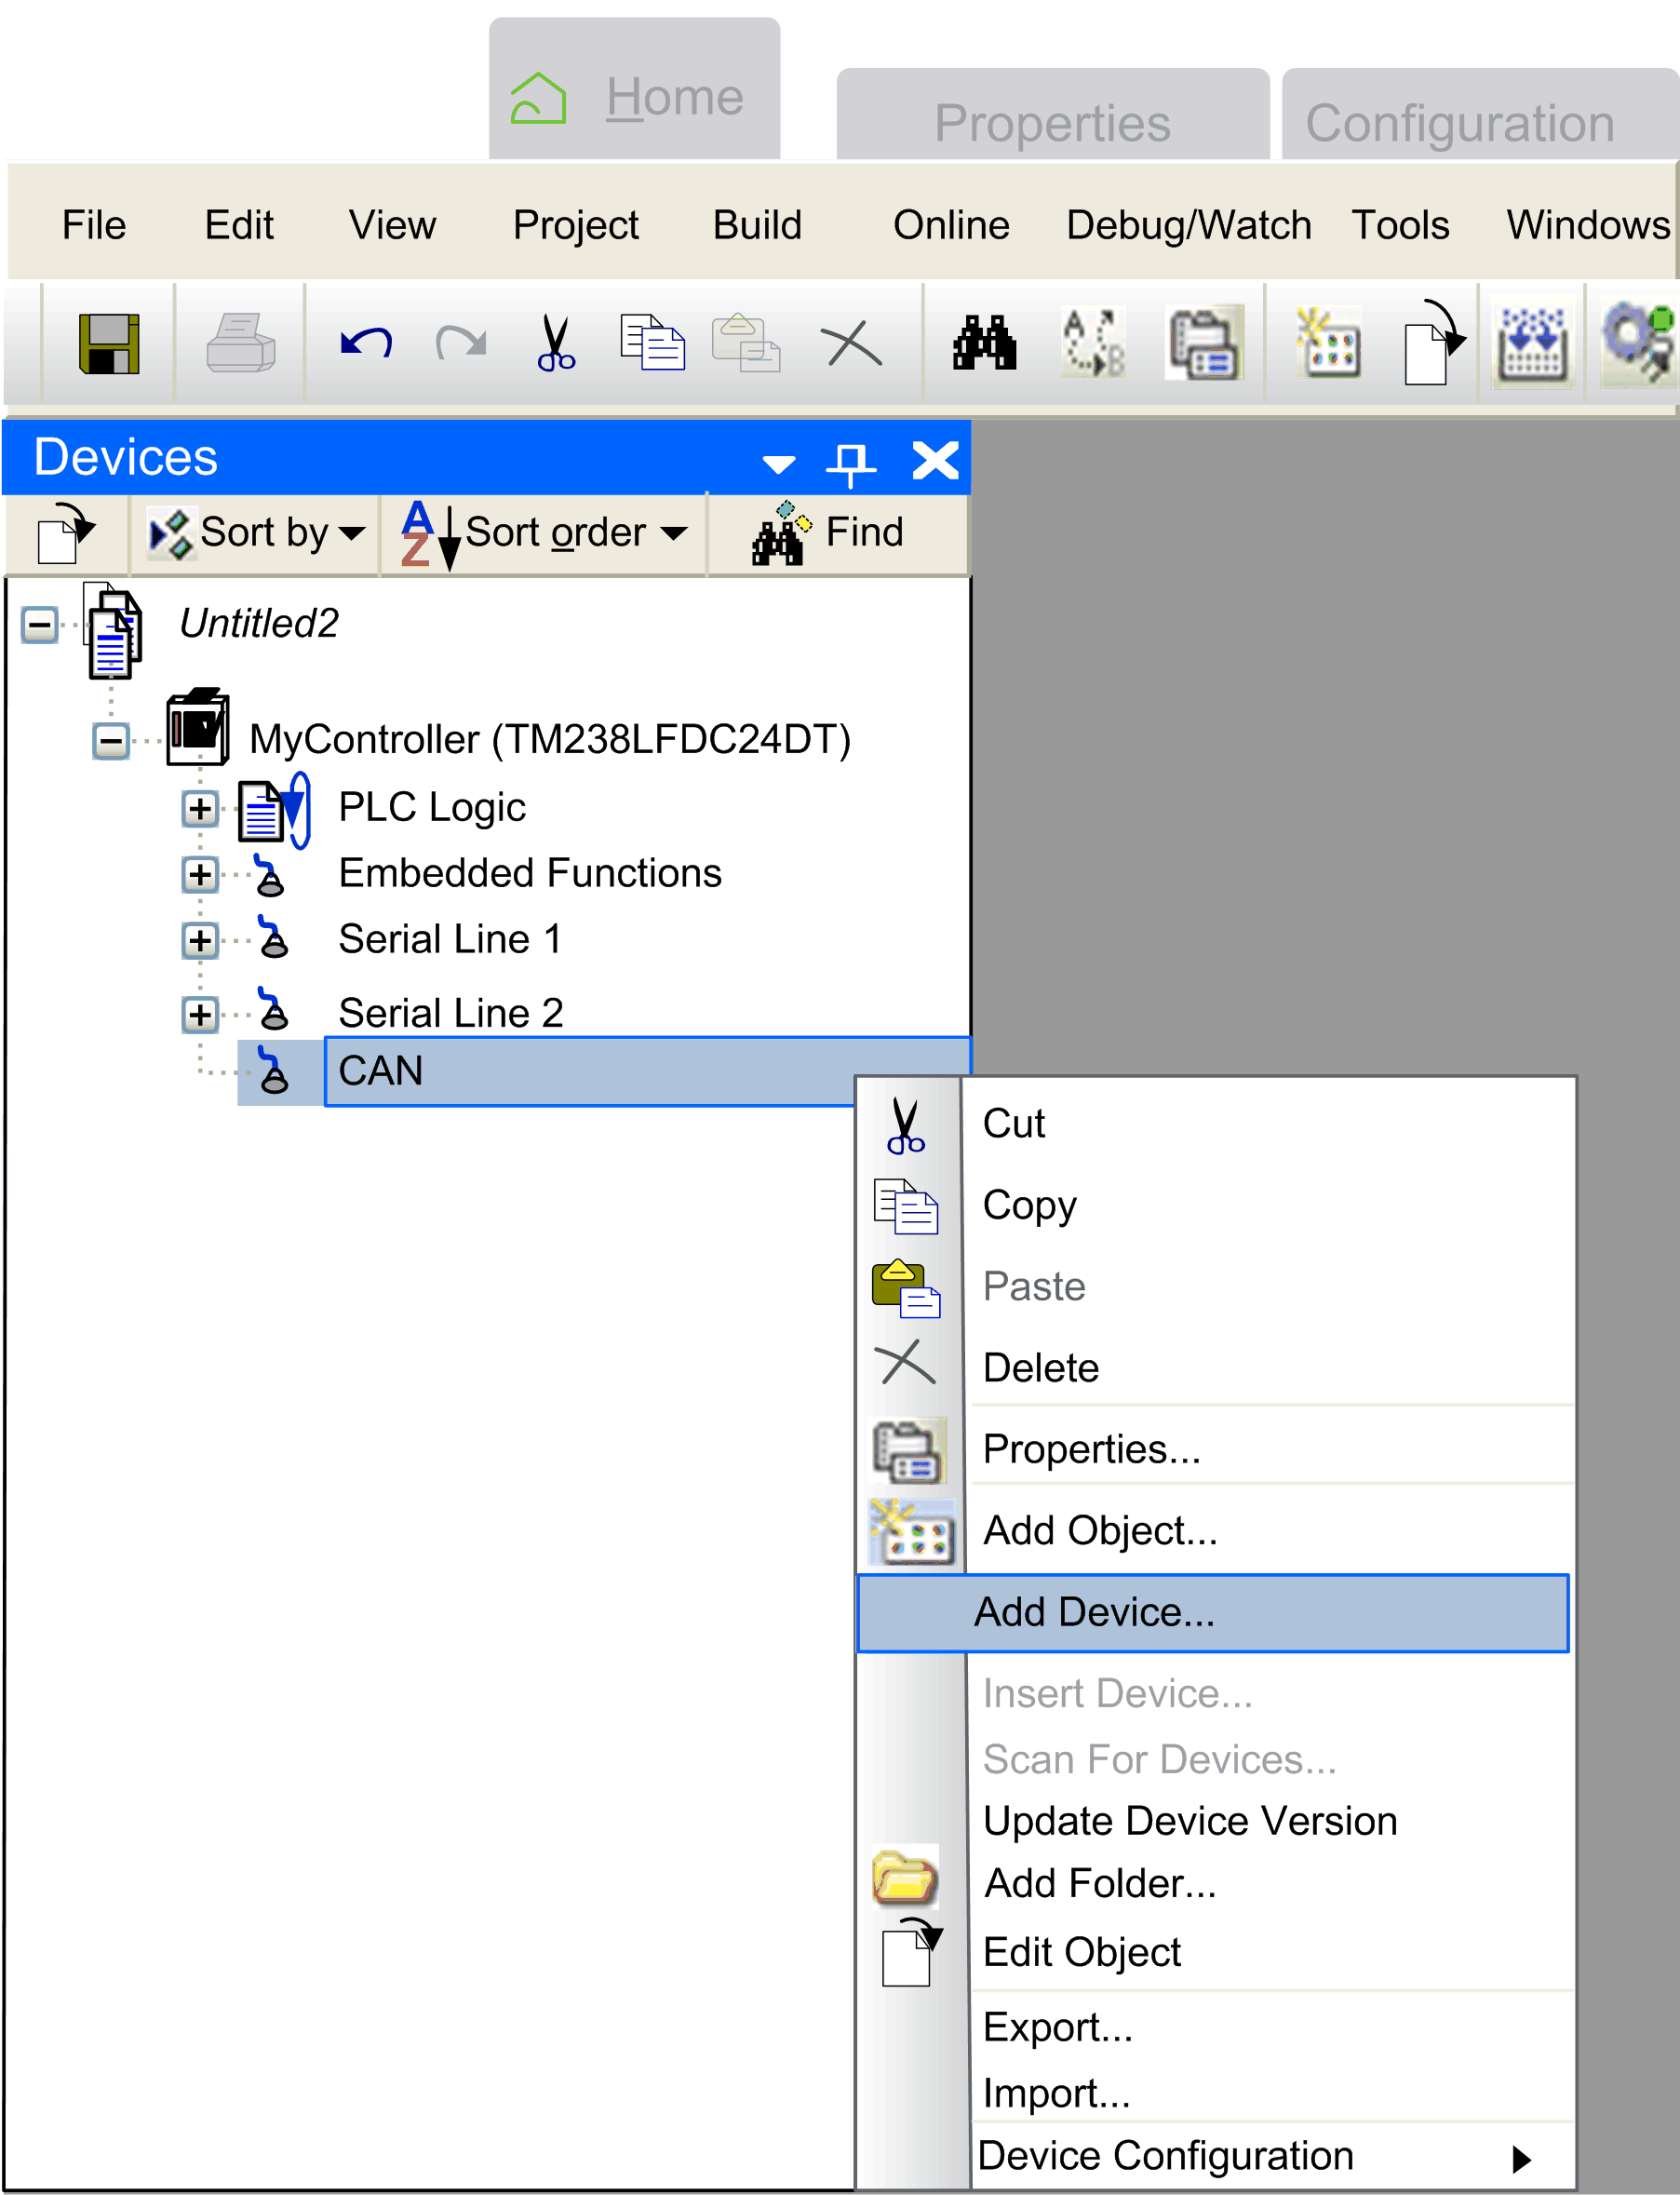
Result: The Add Device window appears. |
|
3 |
Select CANopen Optimized as shown in the figure below. 
Result: CANopen_Optimized (CANopen Optimized) is added under CAN. Refer figure in Step 5. |
|
4 |
Close the Add Device window and double-click CANopen_Optimized (CANopen Optimized). |
|
5 |
Select the CANopen Manager tab. In the Node ID text field, enter a unique node number for CANopen_Optimized as shown in the figure below. 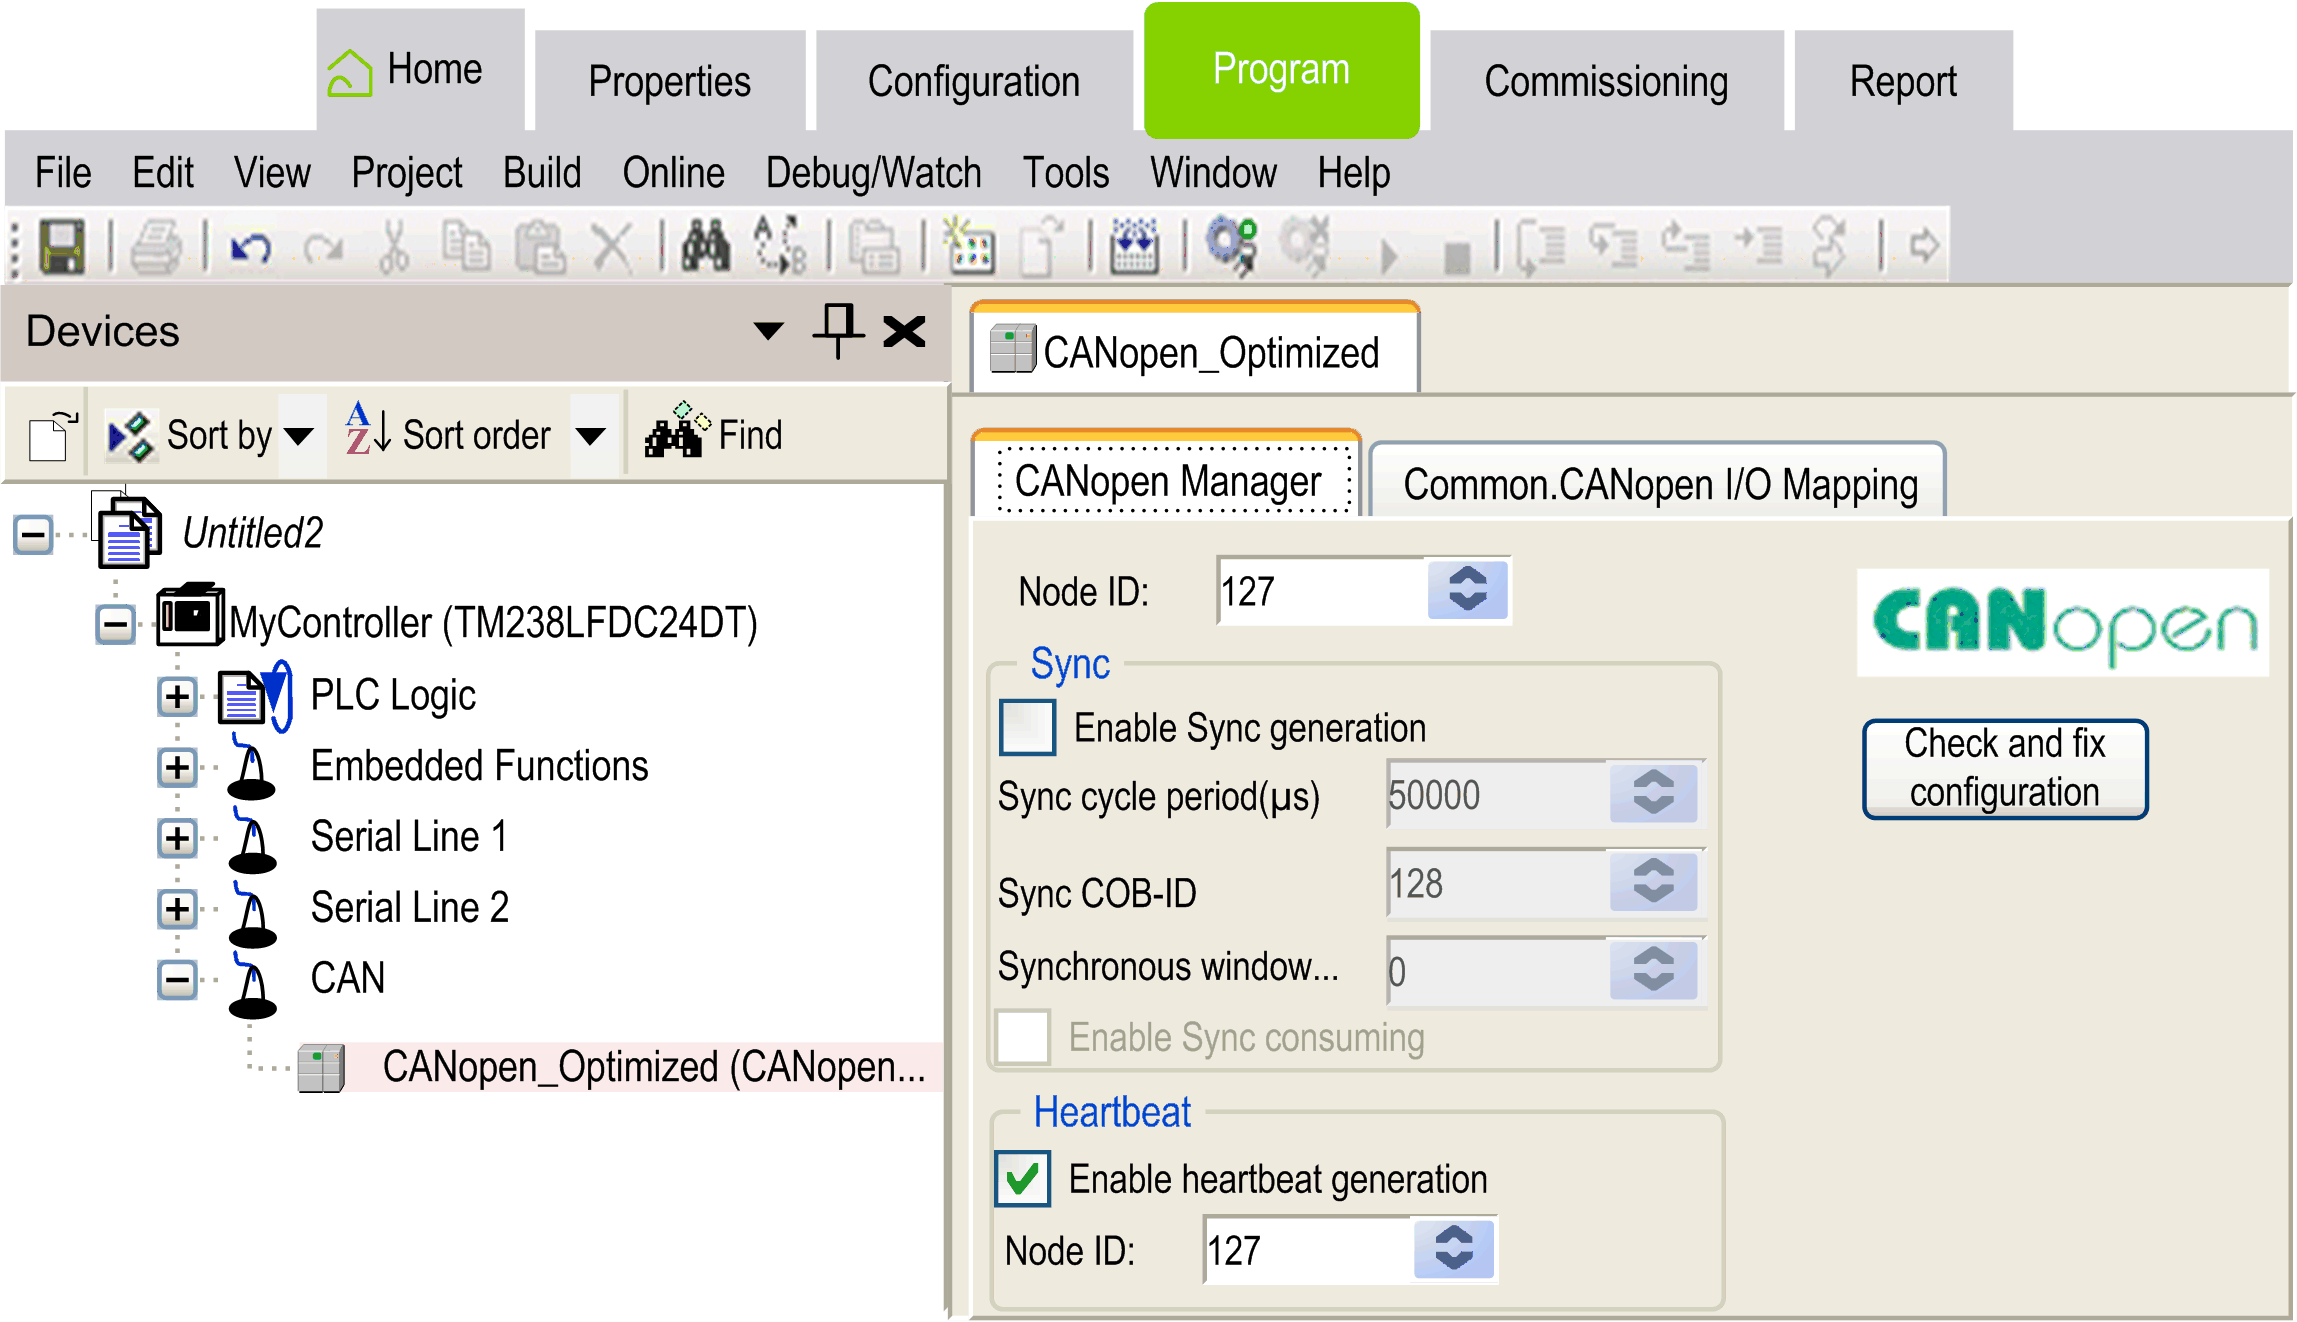
|
|
6 |
Right-click CANopen_Optimized (CANopen Optimized) and select Add Device. Result: The Add Device window appears, showing the TeSysU motor starters with multifunction control unit. Refer figure in Step 7. |
|
7 |
To add the TeSysU motor starters with multifunction control unit in remote configuration mode, double- click TeSysU_Sc_Mu_R and close the Add Device window. Refer figure below. 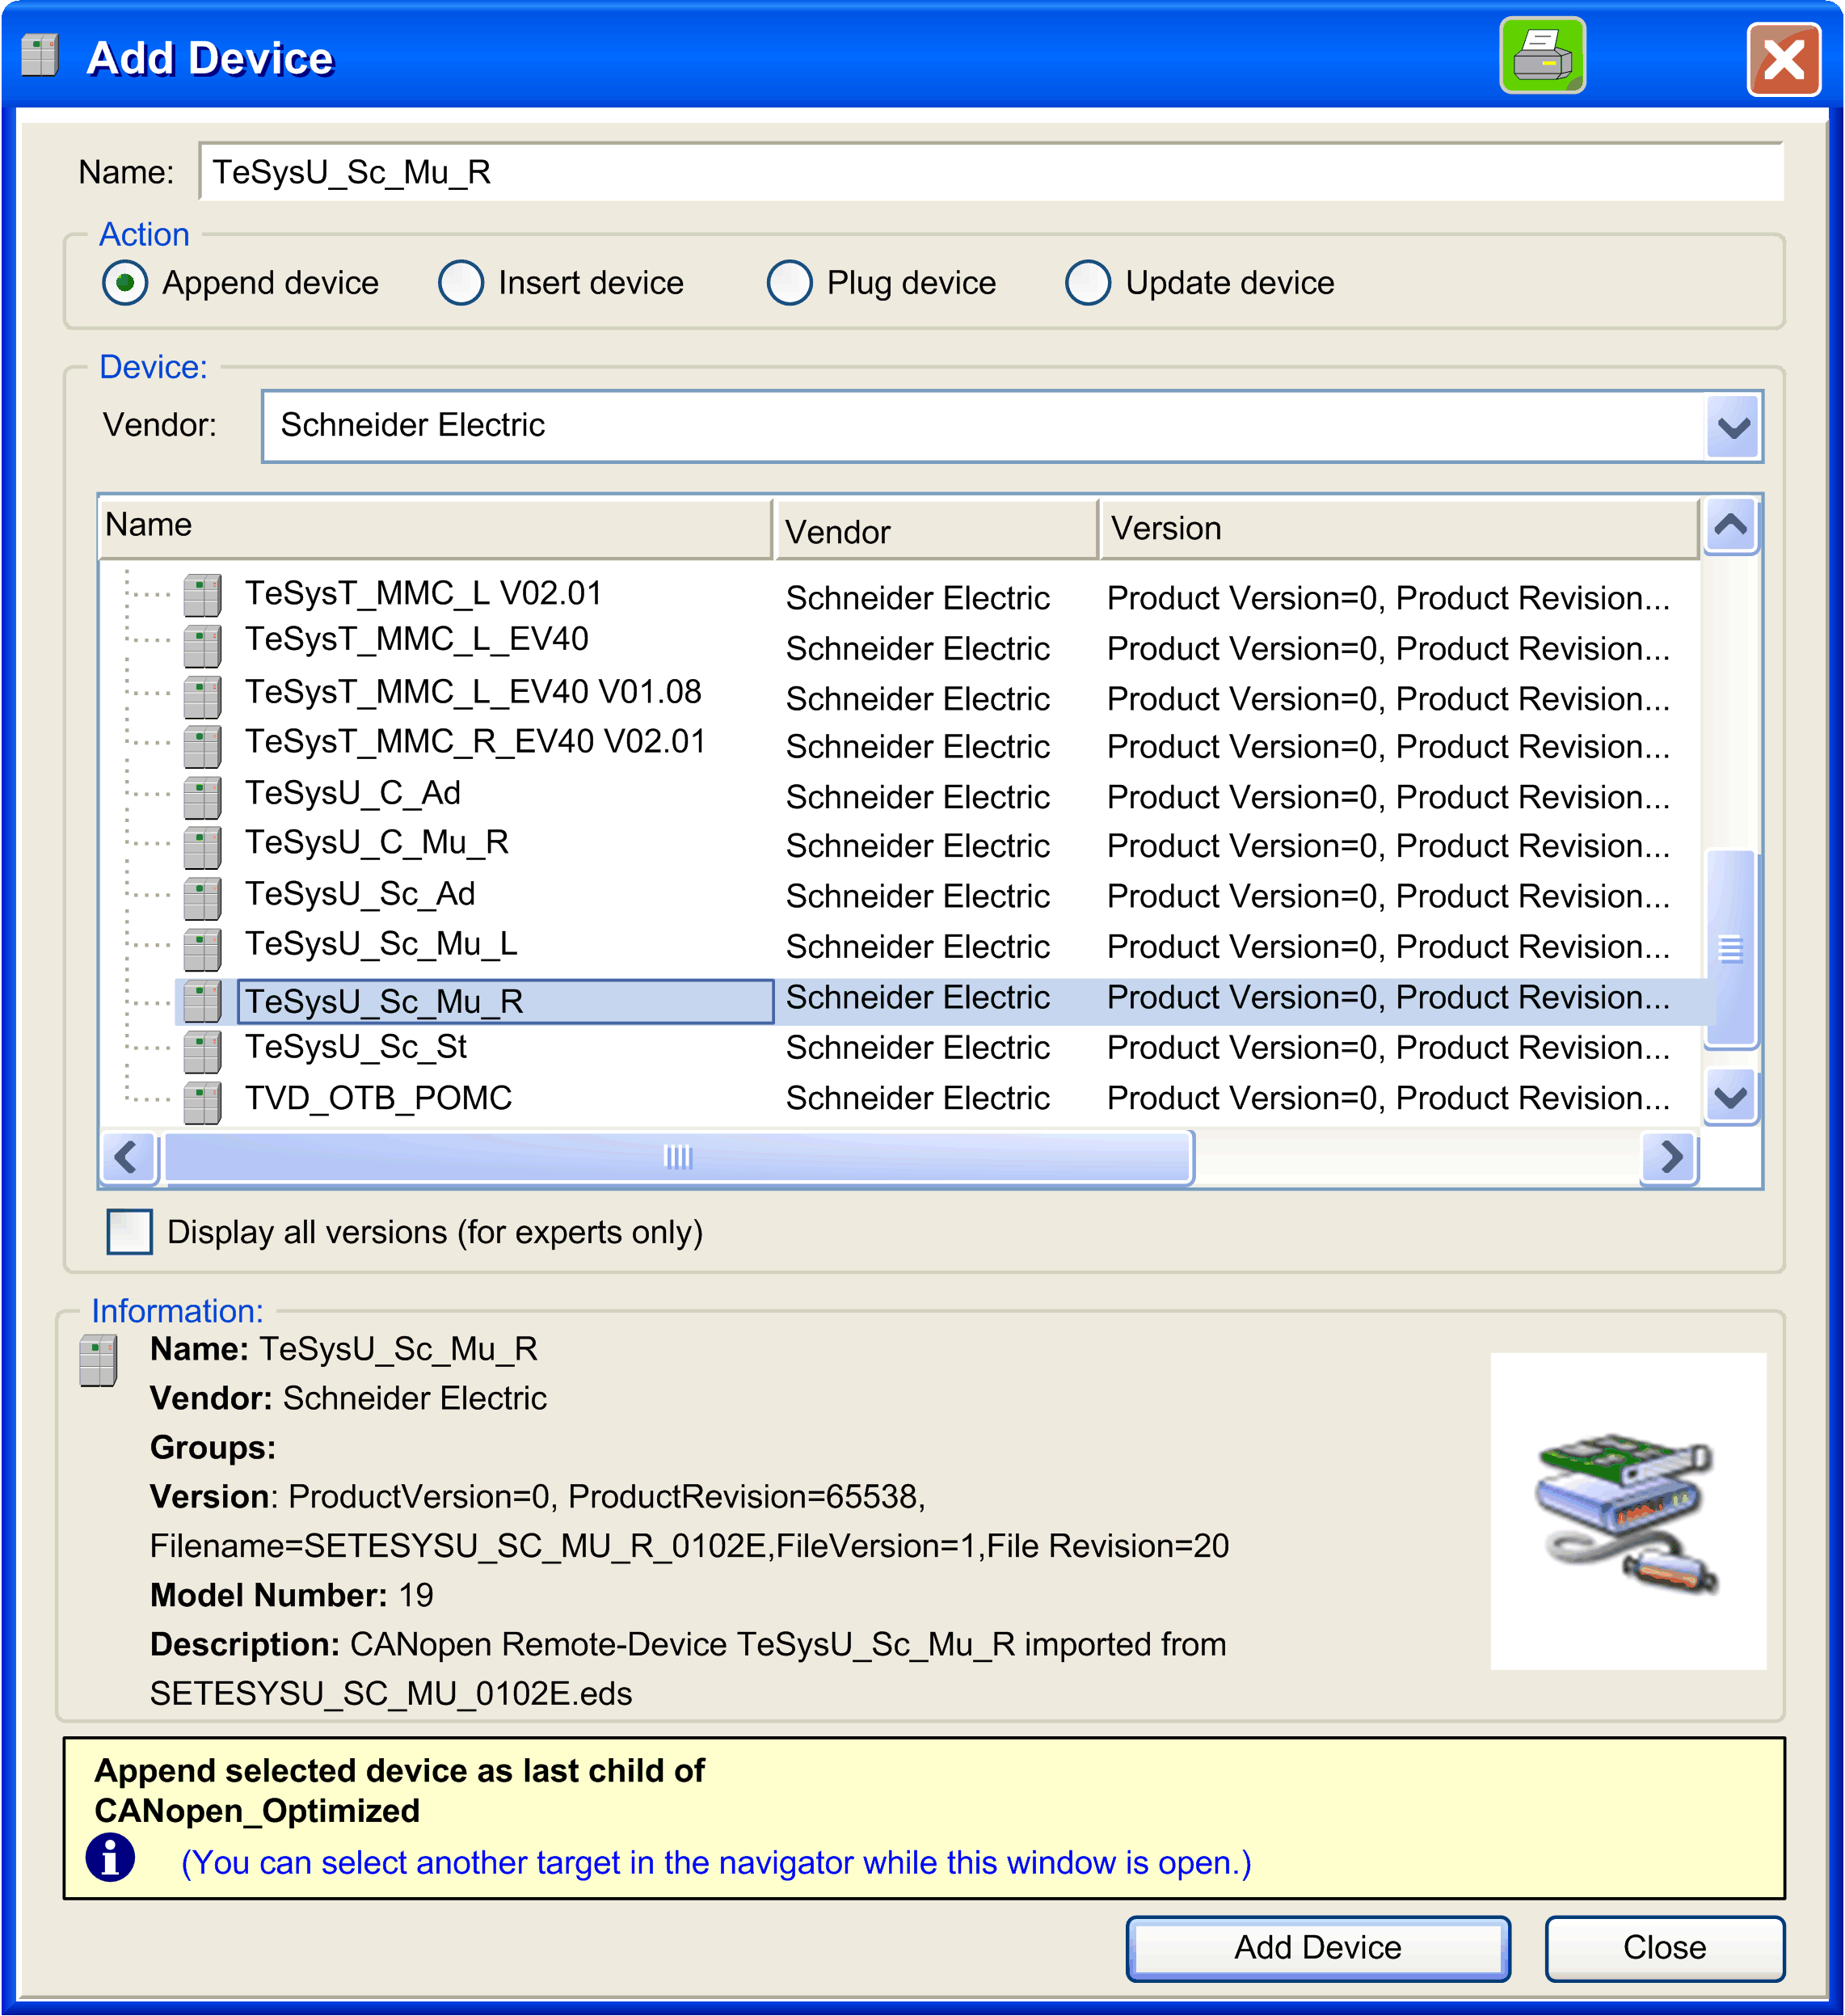
NOTE: The letter at the end of the EDS file name indicates if configuration is managed remotely through the network (R) or locally through the configuration port (L). For proper communication, the TeSys device should be configured in accordance (parameter 601 : configuration mode) to be able to communicate properly. Result: TeSysU_Sc_Mu_R is added under CAN. Refer figure in step 8. |
|
8 |
Double-click TeSysU_Sc_Mu_R. Under the CANopen Remote Device tab, set a unique node number in the Node ID text field as shown in the figure below. 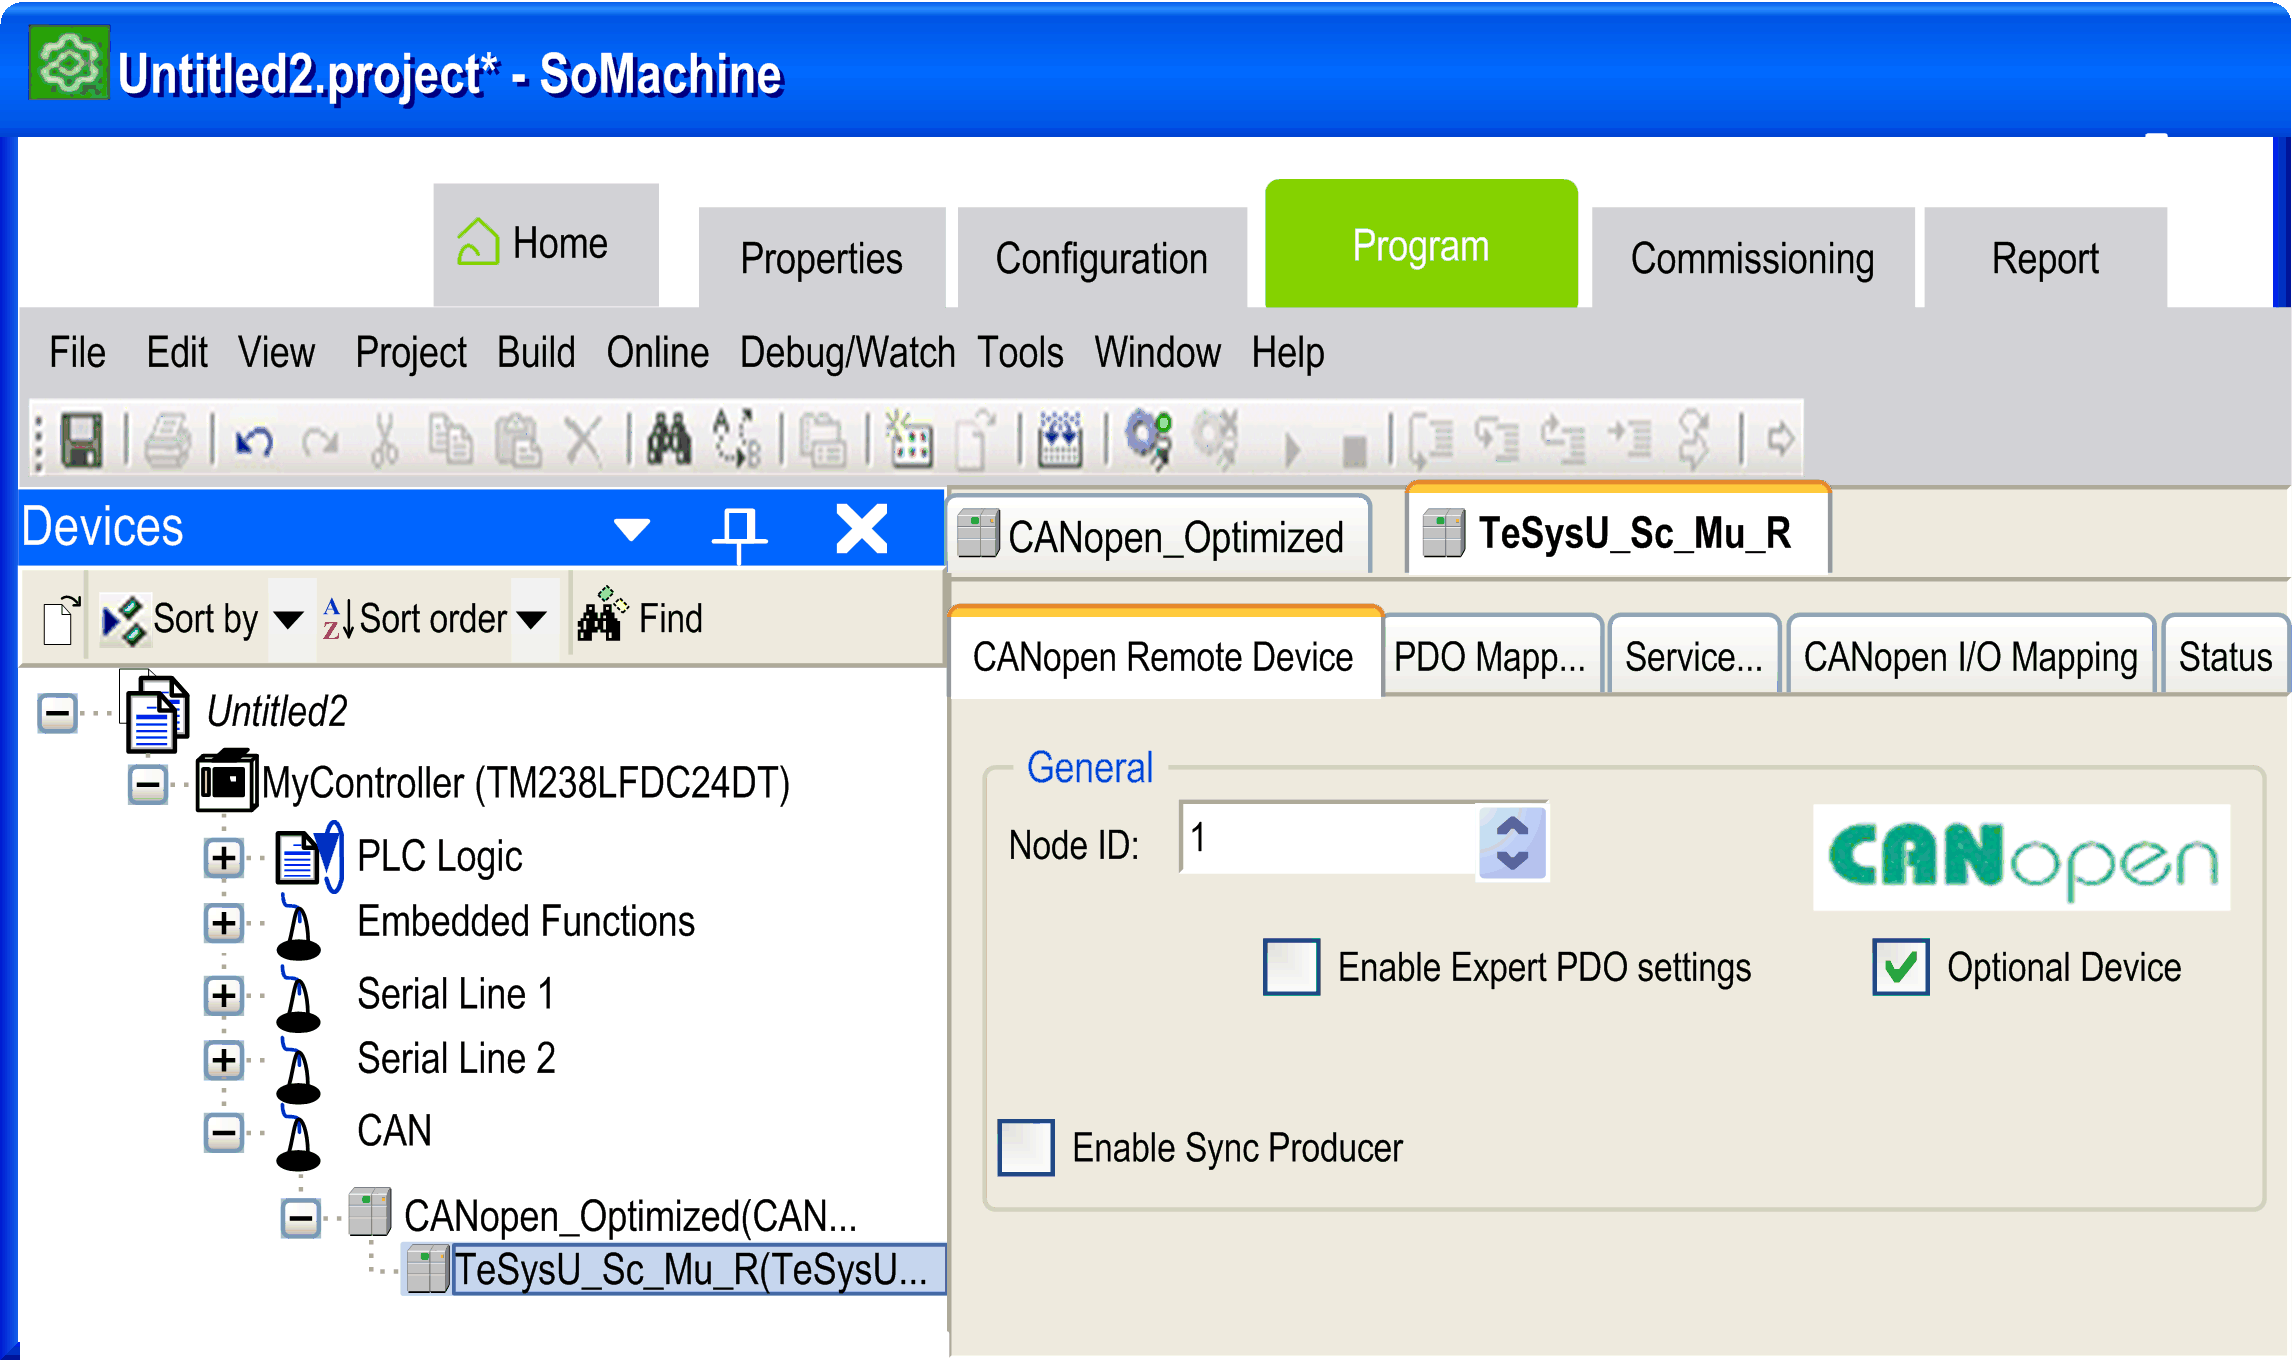
NOTE: The same node number should be set in the slave device using DIP switches for TeSysU and PowerSuite/SoMove through the HMI port for TeSysT as applicable. Refer to the user manual of the respective device for more information. |
|
9 |
From the same window (figure in step 8), select CANopen I/O Mapping tab. Result: A new window appears with channels description. Refer figure in step 10. |
|
10 |
Under the column Variable, enter the variable name (shown in the below figure as Cmd1, Sta1, and Sta2 for control register 1, for status register and for I/O module status register respectively for TeSysT) against the Address column based on the information to be read/written from the CANopen device. 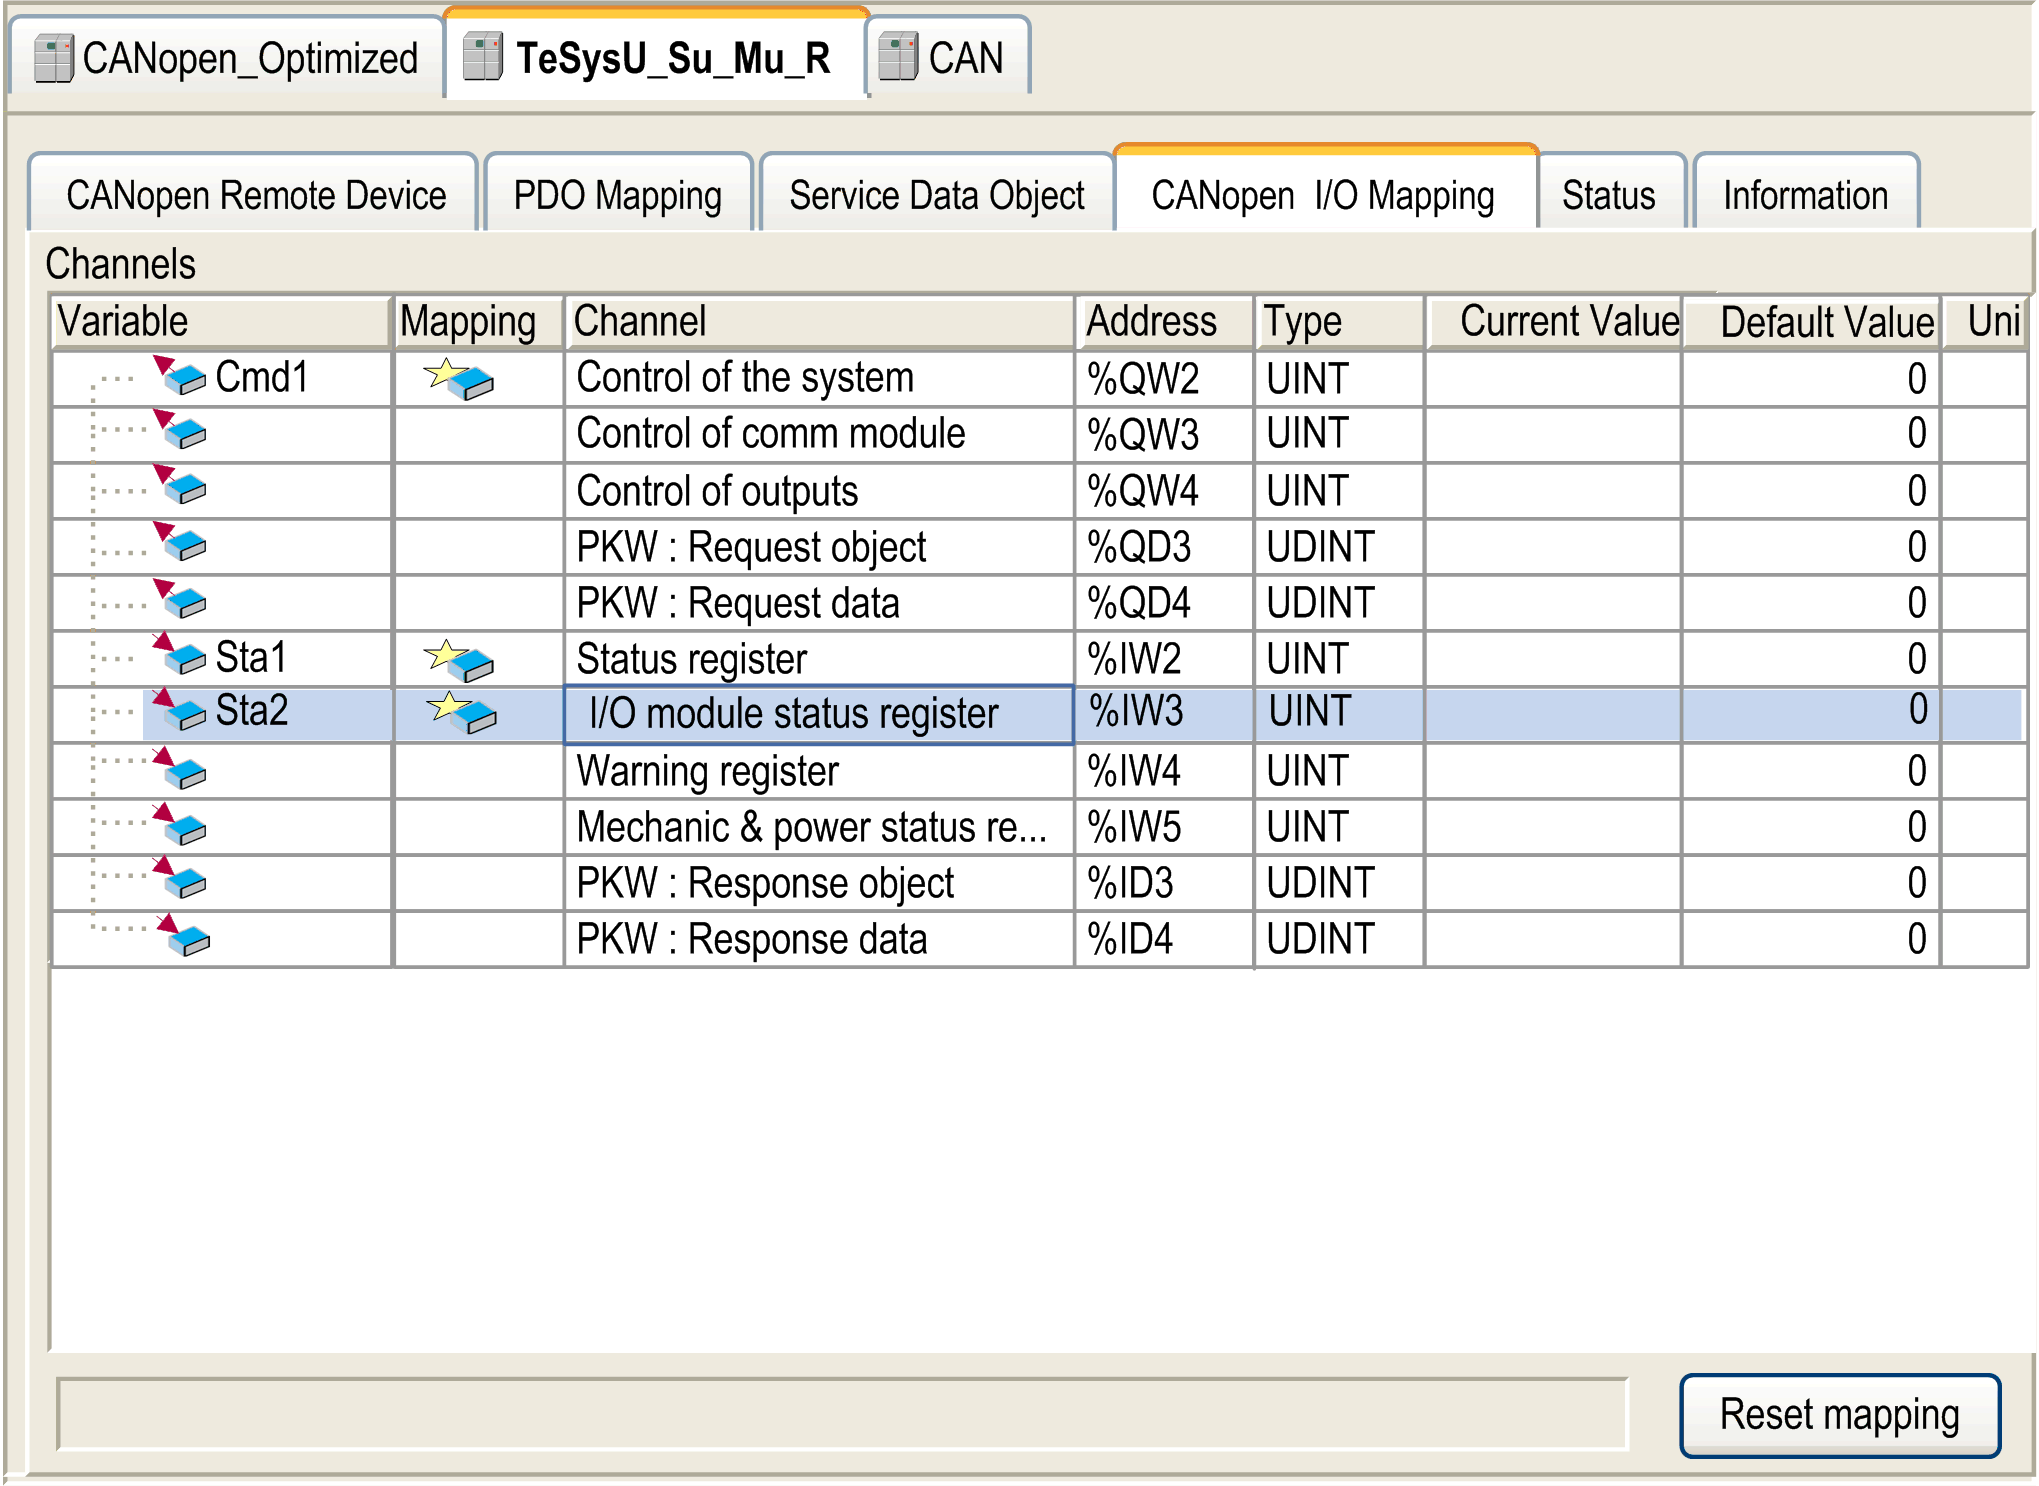
|
|
11 |
Double-click CAN tab. In the Baudrate (bits/s) list, select the CANopen network baudrate as shown in the figure below. 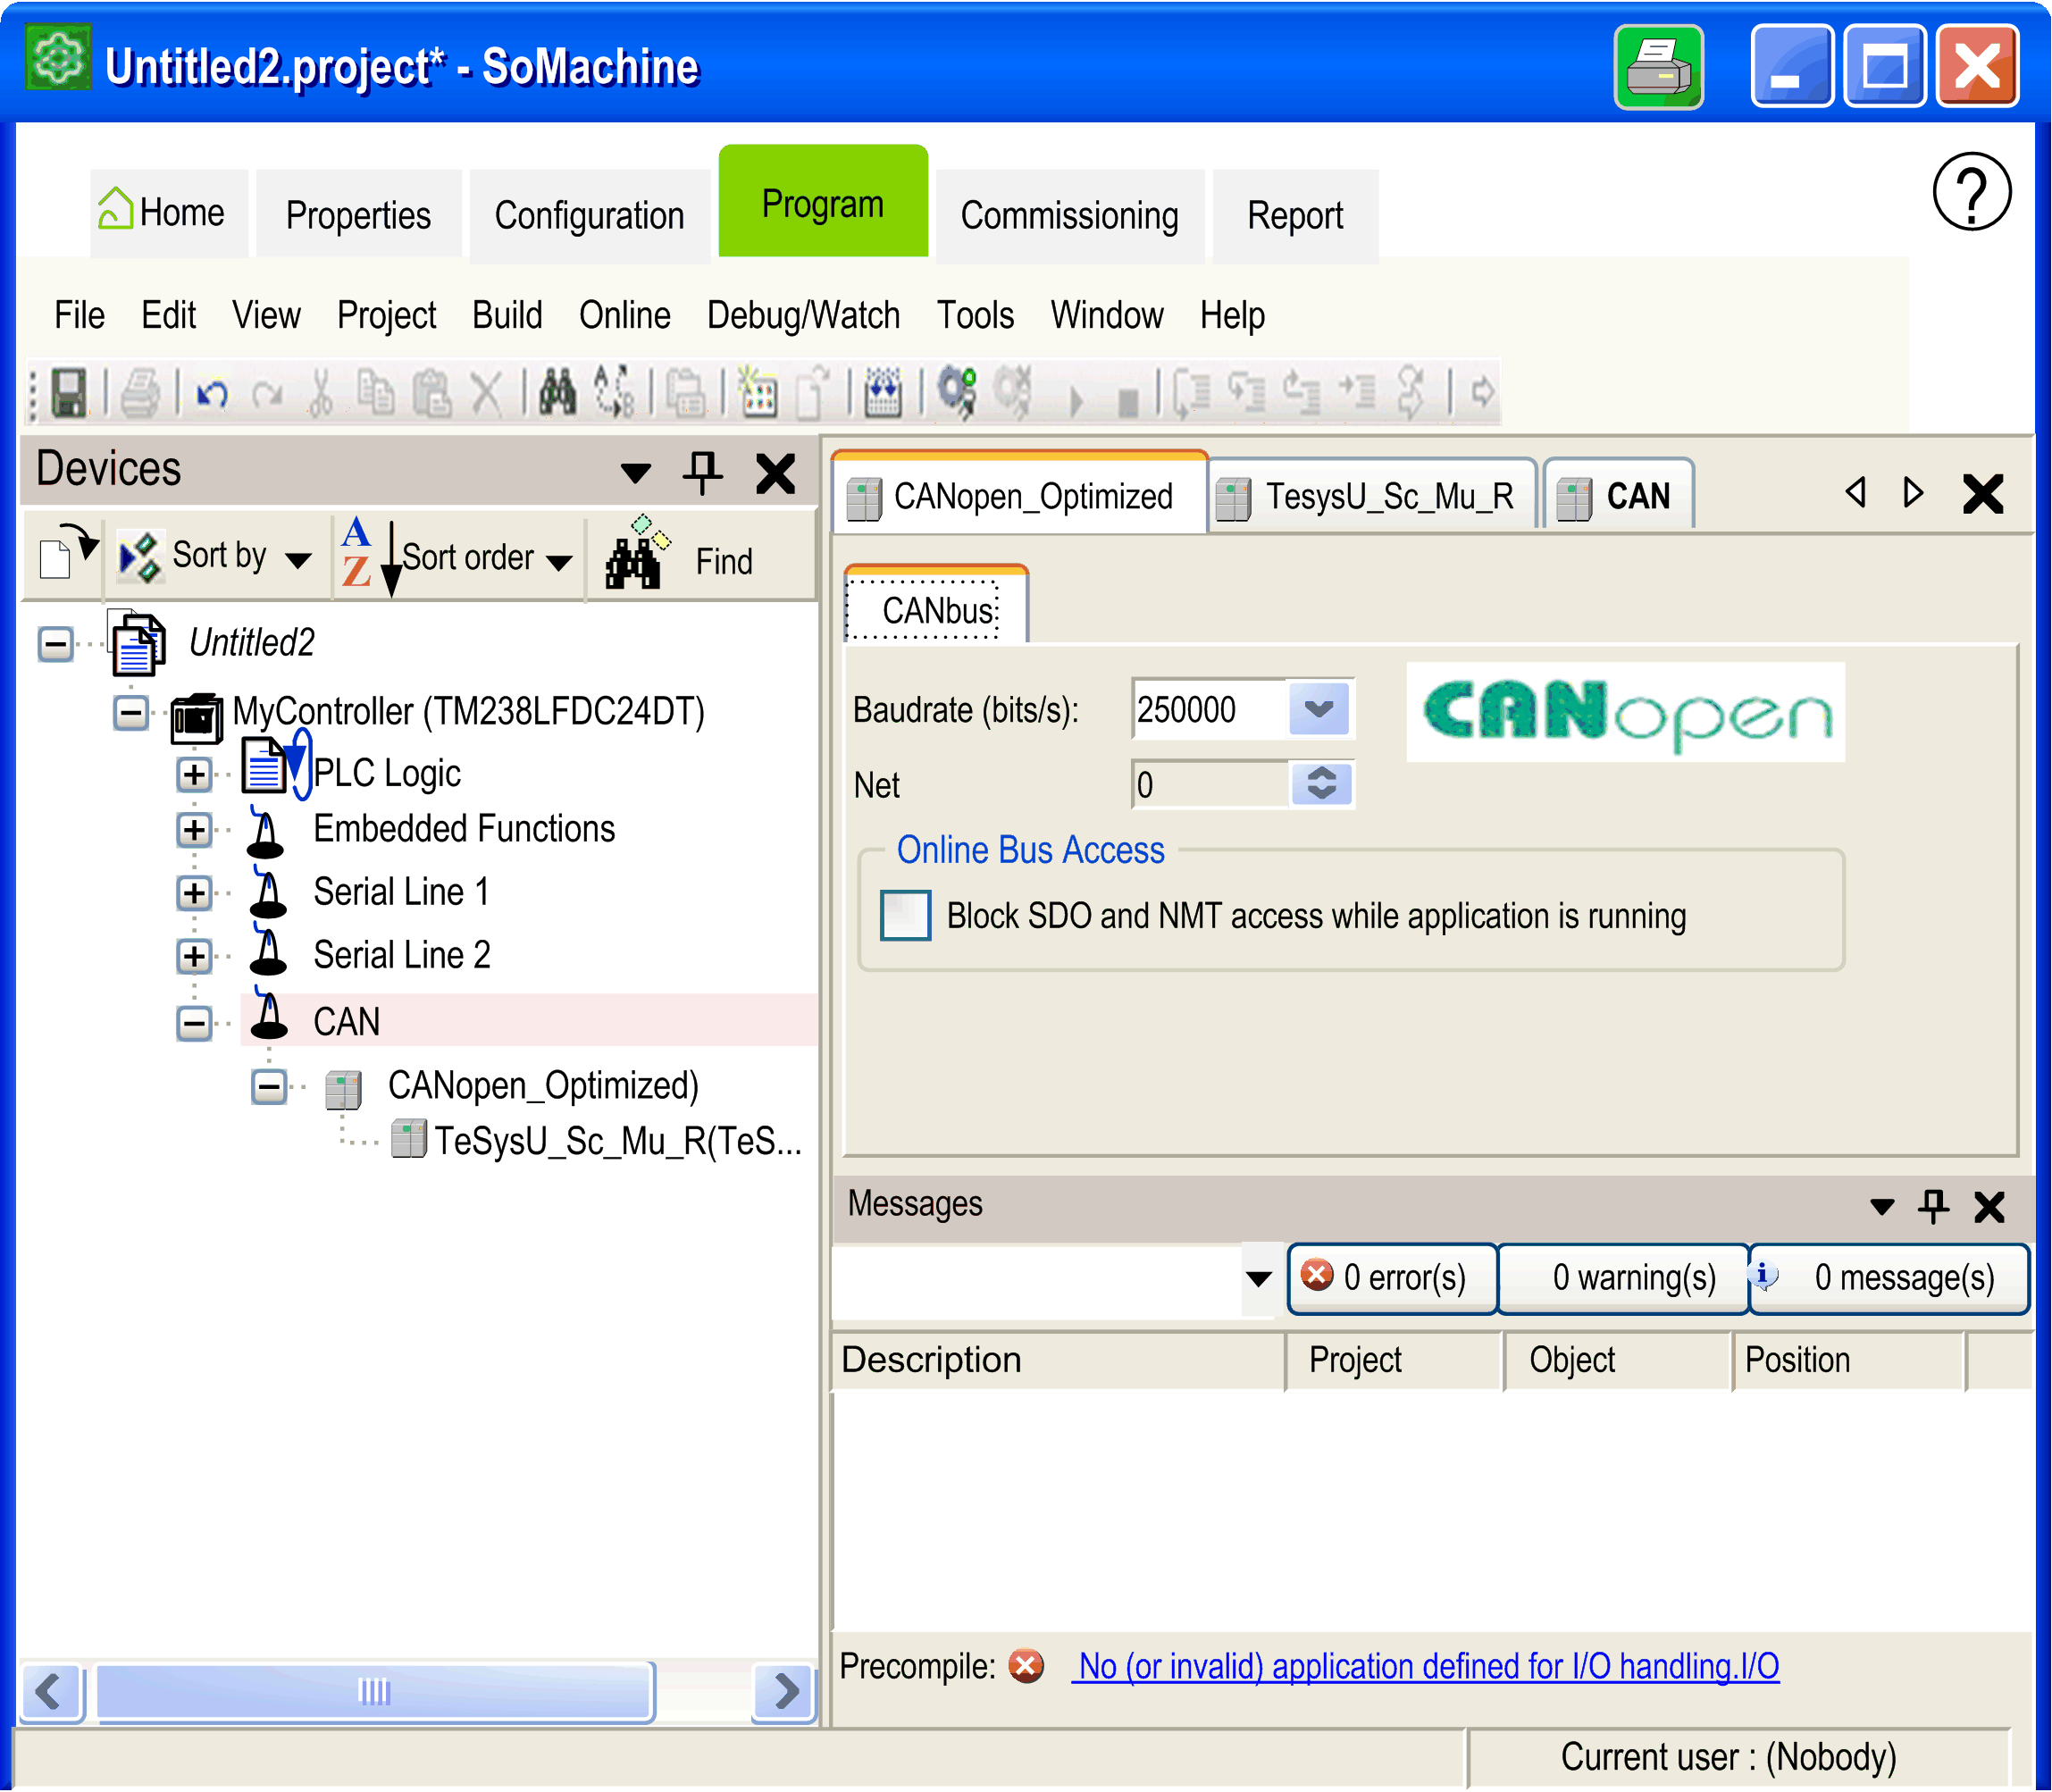
NOTE: The same baudrate should be set in the slave device using DIP switches for TeSysU and PowerSuite/SoMove through the HMI port for TeSysT as applicable. Refer to the user manual of the respective device for more information. Result: CANopen network configuration is complete. |